Well, it has been a while. This blogging thing did not went as I planned it to. It became sacrificed to the day to day business as an Product Architect with the aftermath of switching to AL like breaking up a monolithic application and the transition into this new home office thing which started at the dining table and I had to set everything up from the scratch.
So let’s get to the subject of this blog post: How can we deploy any artifact or app into a docker container? The first thing that probably comes to your mind are Freddy’s containerhelper tools. But how if we could do it as if we are working on-prem and into 20 containers at once? Azure DevOps Pipelines offer this awesome feature of enviroments. Environments are basically the endpoint or resource for a special kind of jobs in devops called deployment jobs
If you take a look into Azure DevOps Pipeline Environments you see that only Kubernetes clusters or virtual machines can be used as resource. Well you can think of containers and how they work as a kind of virtual machine. So therefore we should be and are able to setup a docker container as an environment for our pipelines.
Believe me environments are awesome. If you ever tried to deploy to multiple containers with a regular pipeline you pretty quickly will hit a few road blocks due to the lack of loops in pipelines. We kind of got the matrix strategy we could misuse here but they are still pretty static and need adjustment for every additional container. With environment you just pop up a new one, register it and in the next run the pipeline will deploy to the new environment as well. Environments provide several deployment strategies, tags for deploying to only a certain set of resources or in our case container in an environment and gates for managing approvals.
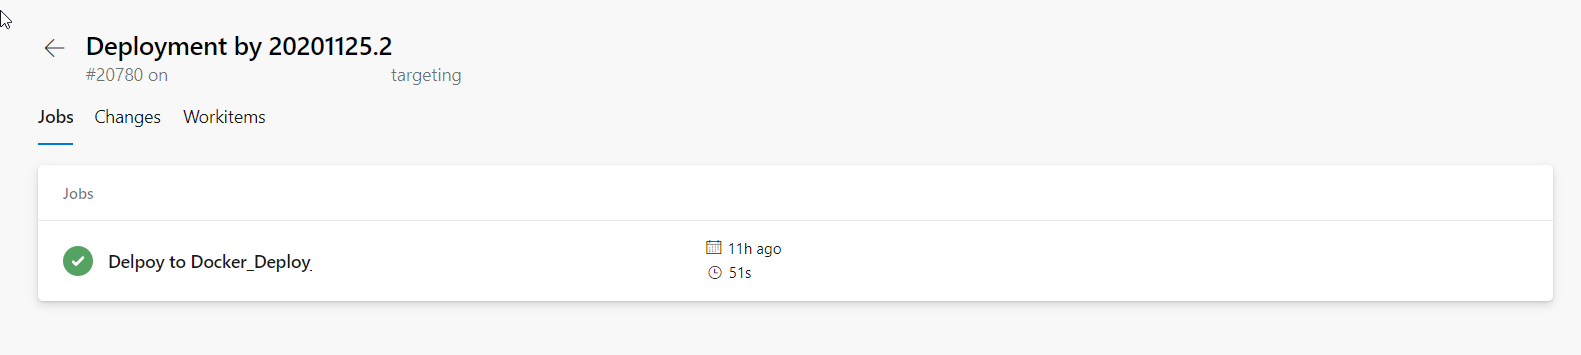
They even show you which changes and related work items have been part of the deployment:
If you want to deploy into a resource or container we need an agent on this resource. Microsoft provides a script or better command sequence for downloading and registering an agent as a resource in an environment. This agent is in fact the same executable as used for pipeline agents. If we take Microsoft’s command sequence, put it in a script, tweak it and massage it a little bit it looks a like this:
Param (
    [Parameter(Mandatory = $true)][string]$PAT
)

$ErrorActionPreference = "Stop";
If (-NOT ([Security.Principal.WindowsPrincipal][Security.Principal.WindowsIdentity]::GetCurrent() ).IsInRole( [Security.Principal.WindowsBuiltInRole] "Administrator")) {
    throw "Run command in an administrator PowerShell prompt"
}
If ($PSVersionTable.PSVersion -lt (New-Object System.Version("3.0"))) {
    throw "The minimum version of Windows PowerShell that is required by the script (3.0) does not match the currently running version of Windows PowerShell."
}
If (-NOT (Test-Path $env:SystemDrive\'azagent')) {
    mkdir $env:SystemDrive\'azagent'
}

cd $env:SystemDrive\'azagent'

for ($i = 1; $i -lt 100; $i++) {
    $destFolder = "A" + $i.ToString();
    if (-NOT (Test-Path ($destFolder))) {
        mkdir $destFolder;
        cd $destFolder;
        break;
    }
    else {
        Write-Host "Found Agent! Doing nothing and leave."
        exit 0;
    }
};
$agentZip = "$PWD\agent.zip";
$DefaultProxy = [System.Net.WebRequest]::DefaultWebProxy;
$securityProtocol = @();
$securityProtocol += [Net.ServicePointManager]::SecurityProtocol;
$securityProtocol += [Net.SecurityProtocolType]::Tls12;
[Net.ServicePointManager]::SecurityProtocol = $securityProtocol;
$WebClient = New-Object Net.WebClient;
$Uri = 'https://vstsagentpackage.azureedge.net/agent/2.175.2/vsts-agent-win-x64-2.175.2.zip';
if ($DefaultProxy -and (-not $DefaultProxy.IsBypassed($Uri))) {
    $WebClient.Proxy = New-Object Net.WebProxy($DefaultProxy.GetProxy($Uri).OriginalString, $True);
};
$WebClient.DownloadFile($Uri, $agentZip);
Add-Type -AssemblyName System.IO.Compression.FileSystem;
[System.IO.Compression.ZipFile]::ExtractToDirectory( $agentZip, "$PWD");
Write-Host ("Configuring Agent '{0}' in project '{1}' with tags '{2}'", $env:devops_resourcename, $env:devops_projectname, $env:devops_tags)
.\config.cmd --environment `
    --environmentname $env:devops_environmentname `
    --unattended `
    --replace `
    --agent $env:devops_resourcename `
    --runasservice `
    --windowsLogonAccount "NT AUTHORITY\SYSTEM" `
    --work '_work' `
    --url $env:devops_organization `
    --projectname $env:devops_projectname `
    --auth PAT `
    --token $PAT `
    --addvirtualmachineresourcetags `
    --virtualmachineresourcetags $env:devops_tags

Remove-Item $agentZip;
You probably recognized that I substituted some values with environment values. Well this is kind of my personal flavor of passing values into an docker container. I kind of prefer the way of passing more or less static variables as an environment variable into a container. You could as well pass them as parameters into your script.
As the script above already shows I am using some environment variables for the script and need to declare them therefore. Also we need get the script into the container. I personally prefer to use docker-compose but as probably the most of you use Freddy’s helper tools. I will stick with the way of using Freddy’s BCContainerHelper for this blog post.
$myScripts = @("https://raw.githubusercontent.com/NAVRockClimber/nav-docker-samples/Install-Environment-Agent/InstallAgent.ps1")
$additionalParameters = @("--env devops_environmentname=IMs")
$additionalParameters += @("--env devops_resourcename=bc170-de")
$additionalParameters += @("--env devops_tags=Docker,IM,Nightly,Sandbox,BC17,DE")
$additionalParameters += @(...)
New-NavContainer -accept_eula `
                 -containerName "test" `
                 -auth NavUserPassword `
                 -artifactUrl $artifactUrl `
                 -additionalParameters $additionalParameters
                 -myScripts $myScripts
All we need to do now is invoking the script in the container. We can do this by:
$DevOpsPAT = <my secret devops PAT>
$containerName = "test"
docker exec $containerName powershell c:\run\my\InstallAgent.ps1 -PAT $DevOpsPAT
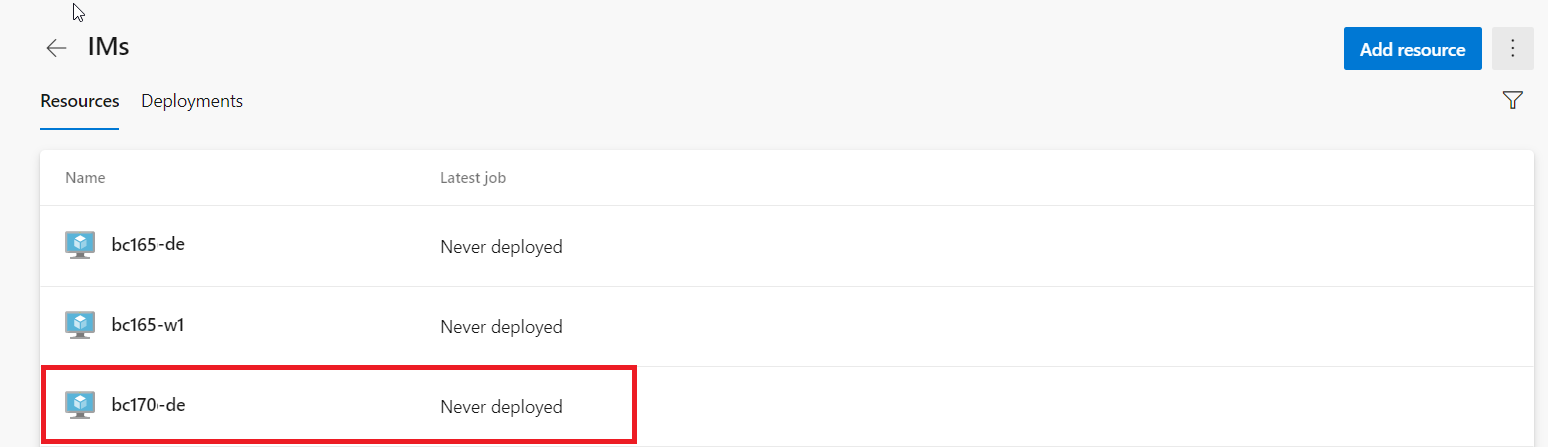
If we now check our environments our freshly created container will appear:
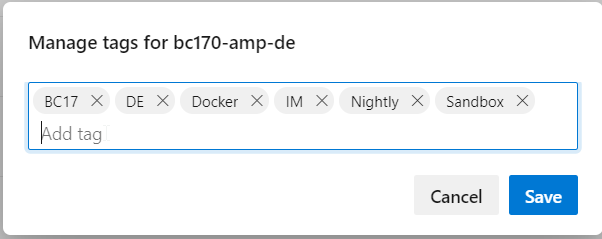
with exactly the tags we defined in our environment variable devops_tags:
Ok, we now got the environment. Let us deploy an app. I usually build my pipelines in a central repository so I can simply roll them out in my Team. Therefore I will show my pipeline templates here.
# File: Job-DeployToContainer.yaml
parameters:
  - name: ArtifactName
    type: string
    default: "app"
  - name: EnvironmentName
    type: string
    default: ""
  - name: EnvironmentTag
    type: string

jobs:
  - deployment: DeployDockerEnvironment
    displayName: Deploy to Docker
    environment:
      name: ${{ parameters.EnvironmentName }}
      resourceType: VirtualMachine
      tags: ${{ parameters.EnvironmentTag }}
    strategy:
      runOnce:
        deploy:
          steps:
            - download: none
            - template: ../Steps/Download-PipelineArtifact.yaml
              parameters:
                Source: current
                Project: $(System.TeamProject)
                Artifact: "${{ parameters.ArtifactName }}"
                Path: $(Build.ArtifactStagingDirectory)
            - template: ../Steps/Get-DockerAdminToolPath.yaml
            - template: ../Steps/Publish-AppOnPrem.yaml
As you can see azure pipeline provide a special kind of job with a few more options than you need for running a standard job. First and obvious the starting keyword is deployment instead of job. We also have to specify the environment we previously set up and a strategy. In the first step I download my artifact, in the second I determine where the PowerShell modules of BC are stored. Yes, this part is heavily inspired from Freddy’s code. Why reinvent the wheel. ;)
# File: Get-DockerAdminToolPath.yaml
steps:
  - powershell: |
      $serviceTierFolder = (Get-Item "C:\Program Files\Microsoft Dynamics NAV\*\Service").FullName
      $serviceTierFolder = (Get-Item "C:\Program Files\Microsoft Dynamics NAV\*\Service").FullName
      $NavManagementPSM = Join-Path -Path $serviceTierFolder -ChildPath "Microsoft.Dynamics.Nav.Management.psm1"
      $NavManagementDLL = Join-Path -Path $serviceTierFolder -ChildPath "Microsoft.Dynamics.Nav.Management.dll"
      $AppsManagementPSD = Join-Path -Path $serviceTierFolder -ChildPath "Microsoft.Dynamics.Nav.Apps.Management.psd1"

      if (Test-Path $NavManagementDLL) {
        Write-Host ("##vso[task.setvariable variable=NavManagement;isOutput=true]{0}" -f $NavManagementDLL)
      }
      if (Test-Path $NavManagementPSM) {
        Write-Host ("##vso[task.setvariable variable=NavManagement;isOutput=true]{0}" -f $NavManagementPSM)
      }

      if (Test-Path $AppsManagementPSD) {
        Write-Host ("##vso[task.setvariable variable=AppsManagement;isOutput=true]{0}" -f $AppsManagementPSD)
      }
    name: GetAdminToolPath
    displayName: "Get Admin Tool Path"
Well all we now got to do now is to import the module and call the standard triad of Publish-NAVApp, Sync-NAVApp and Install-NAVApp / Start-NAVAppDataUpgrade.
# File: Publish-AppOnPrem.yaml
parameters:
  - name: SourceFolder
    type: string
    default: "$(Build.ArtifactStagingDirectory)"
  - name: ServerInstance
    type: string
    default: "BC"
steps:
  - powershell: |
      $NAVManagementPath = "$(GetAdminToolPath.AppsManagement)"
      Import-Module $NAVManagementPath
      $SourceFolder = "${{ parameters.SourceFolder }}"
      $ServerInstance = "${{ parameters.ServerInstance }}"
      $AppFiles = Get-ChildItem -Path $SourceFolder -Filter "*.app" -Recurse
      foreach ($AppFile in $AppFiles)
      {
        $AppInfo = Get-NAVAppInfo -Path $AppFile.Fullname
        $InstalledApp = Get-NAVAppInfo -ServerInstance $ServerInstance -Name $AppInfo.Name
        if ($InstalledApp)
        {
          Write-Host ("Uninstalling & Unpublishing: {0} {1} " -f $InstalledApp.Name, $InstalledApp.Version)
          Uninstall-NAVApp -ServerInstance $ServerInstance -Name $InstalledApp.Name
          Unpublish-NAVApp -ServerInstance $ServerInstance -Name $InstalledApp.Name
        }
        Write-Host ("Installing & Publishing: {0} {1} " -f $AppInfo.Name, $AppInfo.Version)
        Publish-NAVApp -ServerInstance $ServerInstance -Path $AppFile.Fullname -SkipVerification
        Sync-NAVApp -ServerInstance $ServerInstance -Name $AppInfo.Name
        if ($InstalledApp) {
          Start-NAVAppDataUpgrade -ServerInstance $ServerInstance -Name $AppInfo.Name
        } else {
          Install-NAVApp -ServerInstance $ServerInstance -Name $AppInfo.Name
        }
      }
Environment are a pretty cool feature of Azure Pipelines, we can set them up quickly and just forget about the rest. Out pipeline will take care of the rest.
Notes:
In the environment section I told you the matrix strategy needs manual adjustment. After completing this blog entry I discovered that you can generate a matrix via code.